Logo Design Process - Part 2
In this series, I will go over the whole process of designing my visual identity. It's quite long so I've divided it into 5 parts:
- Part 1: Logo Design Process
- Part 2: Logo Design Process cont.
- Part 3: Colours, Submarks, and Patterns
- Part 4: Stationery Design
- Part 5: Stationery Design cont.
This post is a continuation of my previous post where I discussed how I used the prime factorisation of 48 (24 × 3) to generate these trees:
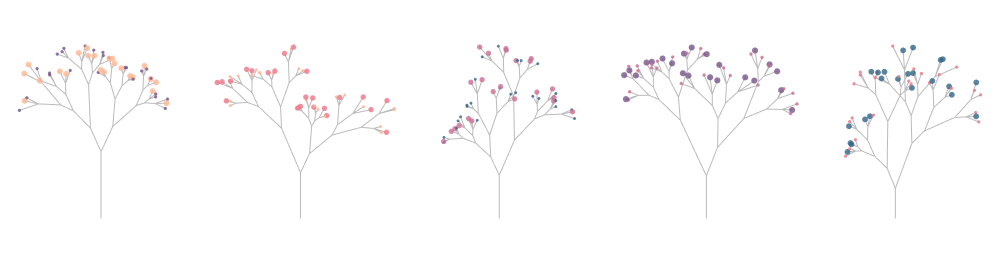
... which I decided weren't logo material, but I was determined to make the generative-tree-for-a-logo idea work somehow so I decided to stick with it.
Since 24 = 42, I thought I'd start with 42 × 3. This time I decided not to randomise the branch angles and lengths. Instead, I used the first values that came to mind... and the best thing happened:
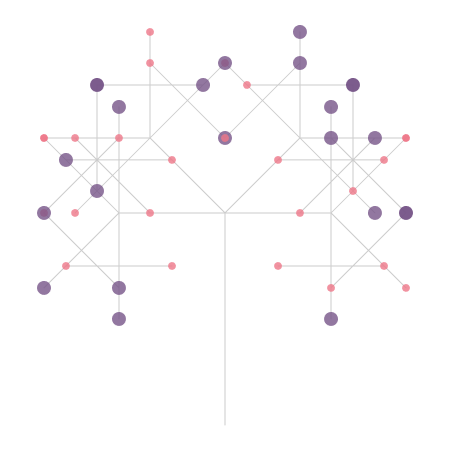
I loved it! I was finally getting somewhere. It's probably not easy to tell at first glance but the first two levels have a branching factor of 4, and the last one, 3. Here it is broken down:
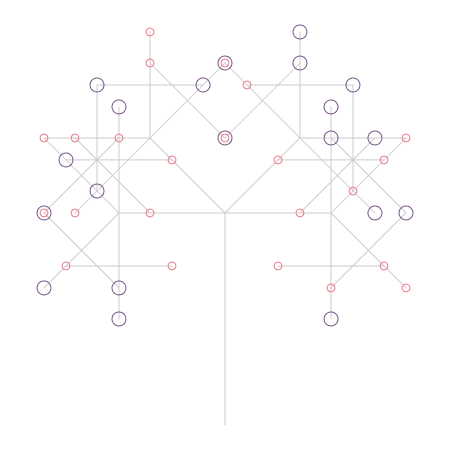
Some of the 'bits' overlap in this tree making it appear as though a few are missing, so I got rid of the fill. It still doesn't help if, say, two 1's (or 0's) overlap, but I was okay with that:
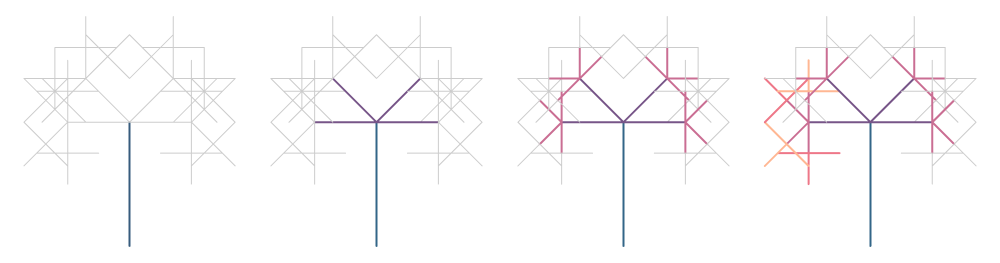
I loved the geometric shape (even more than the more organic looking trees) and was curious to see what kind of trees other combinations of branch angles and lengths would generate. These are just a few of them:
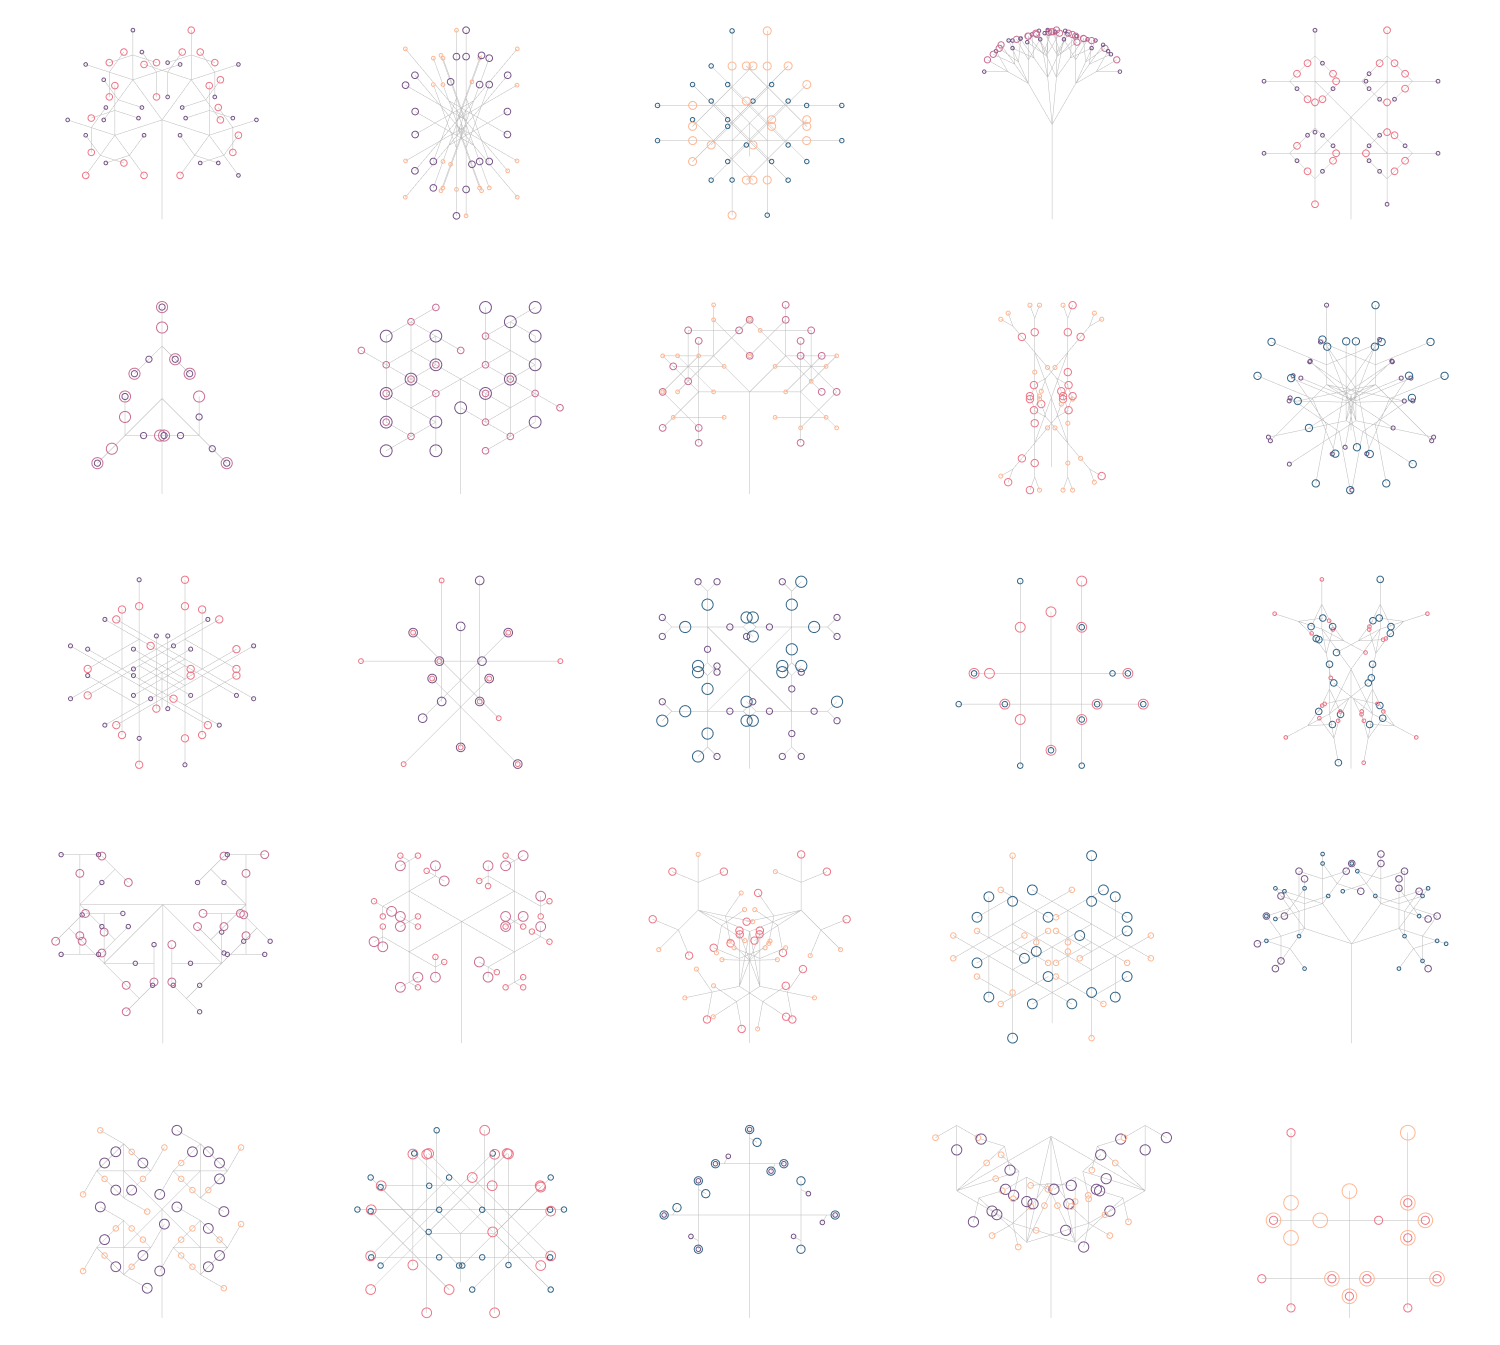
These trees all share the same branching pattern (4x4x3)! It was hard to decide which one I liked best, but I settled on this one:
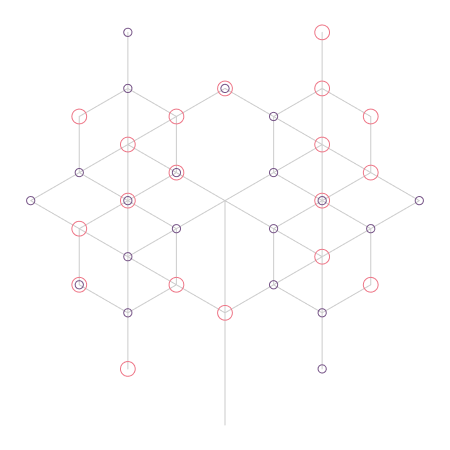
It was too complex to use as is, though - the circles were too small and too many, for starters - so I tried playing with the sizes of the circles, and even tried replacing them with other shapes... but nothing worked. It seemed the 'bits' had to go, so I (very reluctantly) got rid of them altogether:

Looking at it, I was reminded of logo grids/construction guides, so I thought I'd use it to create my final logo... and after staring at it for longer than I care to admit, I noticed this:
![]()
Initially, I was trying to avoid using brackets/braces as I didn't want to create a logo that was a rehash of every other developer's logo... but all I could see was < > and { }:
![]()
I then tried combining the shapes in various ways, but ultimately decided to keep all the line segments within the combined shapes:
![]()
Once I got rid of the extra line segments, though, something about it looked off, so I tried playing with the distance between the two sides and thought the middle one looked more balanced than the other two:
![]()
The final logo:
![]()
Fun fact: the logo is made up of 48 line segments, and I've decided that they represent the 48 bits that make up my name.
It took a long way to get here, but I'm very happy with how it turned out!
In Part 3, I'll go over how I turned this logo into a responsive one, and used it to generate patterns.
Thank you for reading!
Zaineb